I had the opportunity to recently play a game with my current Tyranid list versus one of the better SW players in my area. The mission used the BeakyCon 40k format - three objectives all equally weighted - killpoints, Seize Ground plus Capture and Control. Whichever player takes the most objectives wins the game. If there is a draw on the three objectives then victory points are used as the tie breaker. We randomly rolled for objectives and got Spearhead.
Here is my abbreviated army list:
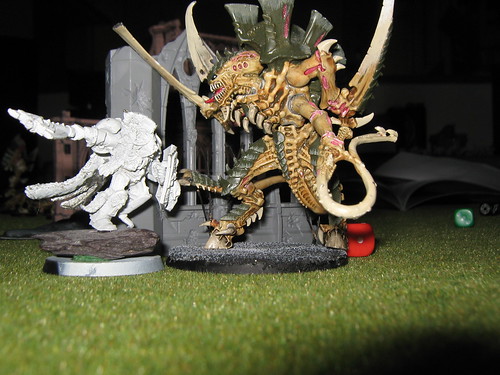
Alpha Warrior - pair of bone swords, adrenal glands & scything talons
Trygon Prime - adrenal glands
Trygon Prime - adrenal glands
10x Yrmgal genestealer
3x Hive Guard (note that in the future I'll switch this unit out for a couple of Zoanthropes mounted in a mycetic spore)
Doom of Malanti (DoM) - mycetic spore
20x termagant w. Devourers (devilgants)- mycetic spore
10x genestealer w. toxin sacs incl. Broodlord
10x genestealer w. toxin sacs incl. Broodlord
3x Warrior - 2x deathspitter, barbed strangler, pair of bone swords - mycetic spore
10x Hormogaunt - adrenal glands & toxin sacs
This is a reserve list with only the Hive Guard starting deployed on the table. After discussing my list with some other respected Tyranid players I've come to the conclusion that Zoies are a better choice since they have synapse and don't need another unit with synapse clode by to prevent Instinctive Behavior tests. The Alpha Warrior is attached to the Hormagants and depending on how my rolls for reserves play out I generally prefer for them to pop out of a burrowed hole left behind by one of the two Trygon Primes. Genestealers typically outflank and obviously the Yrmgal genestealers manifest themselves such that once they become active they can immediately charge a close by enemy unit. The termagants drop in and lay waste to an enemy unit - 60 S4 shots can definitely do some real damage and they can usually target an exposed unit. The Doom of Malanti also drops in from reserve and does it's thing - hopefully working in conjunction with one of the Broodlords (Aura of Despair for -1 Ld which is cumulative if the other Broodlord happens to be in range as well). The Warriors are there mainly to extend the synapse bubble and anchor my backfield - they are not intended to see much action. The two Trygon Primes are basically deterrents and take some of the heat off the other units plus they can extend the synapse bubble from the front.
Here is my opponent's abbreviated Space Wolves list (it's been more than a week since I played this game so my memory is a bit rusty):
Wolf Lord on Thunderwolf mount - thunderhammer, stormshield, runic armor, wolf tooth necklace, Saga of the Bear
Wolf Lord on Thunderwolf mount - frost axe, stormshield, runic armor, wolf tooth necklace
Rune Priest - Living Lightning & JotWW
Rune Priest - Living Lightning & Murderous Hurricane
3x Thunderwolf cavalry (TWC), stormshields, power fist
3x Thunderwolf cavalry, stormshields, power fist
5x Long Fang - 3x missile launcher, 2x lascannon
5x Long Fang - 2x plasma cannon, heavy bolter, 2x missile launcher
Vindicator
10x Grey Hunter - power fist, meltagun, plasmagun - rhino
5x Grey Hunter - plasmagun
5x Grey Hunter - meltagun
As stated above the deployment was Spearhead. I won the roll and opted to go second. My opponent deployed in a castle over in one of his table quarters. One Rune Priest was attached to each of the Long Fang packs. Each Wolf Lord was attached to one of the TWC. I hid my Yrmgal genestealers in a building close to his castle and held everything else in reserve - that's how the army works !!
Turn One - Space Wolves
Both TWC shuffled a bit.
Turn One - Tyranid
* Crickets chirping *
Turn Two - Space Wolves
Again the Space Wolves shuffle a bit in preparation for the soon to come pandemic Tyranid infestation.
Turn Two - Tyranids
In comes one Trygon Prime, the devilgants, one brood of genestealers, Yrmgal genestealers and the Doom of Malanti. The Trygon Prime burrows out from the ground close to one of the five Grey Hunter squads while the devilgants land right in front of a Long Fang pack. The genestealers come in from reserve on the short table edge close to a squad of TWC with the Saga Lord and the Yrmgal genestealers emerge from their slumber to join forces with the other newly arrived brood of genestealers. The DoM drops in close to the castle over beside the TWC that the genestealers are going to multi assaulted. My goal this turn is to remove as many enemy units as possible with as little overlap as possible. The Trygons will be bait units to draw away the TWC so I can pulverize the lil dawgs with my other units. At the beginning of the shooting phase the DoM sucks up a few wounds from a couple of units... Each wound adds to the strength of his pie plate so it's all good. The devilgants shoot down a unit of Long Fangs leaving only the Rune Priest as a bystander. The Trygon fires into a five man squad of Grey Hunters and drops one. The spores fail to inflict any damage. The DoM fires upon a five man squad of Grey Hunters but it scatters off course. The genestealers fleet towards one unit of TWC outside of cover - both units will be able to run the tag team in the turnbuckle. After the charge there is one Thunderwolf left with one wound as well as the Wolf Lord with two wounds... I opted to grant the Yrmgal genestealers an extra attack so that was a whole of attacks directed upon the TWC. In return the last TWC and Wolf Lord scores a few wounds versus the broods and pass their morale check. It was a good turn for the tendril.
Turn 3 - Space Wolves
The free unit of TWC move towards the Trygon Prime and the Vindicator lines up a shot on the devilgants. Shooting sees the Trygon Prime lose a couple wounds and the Vindicator's pie plate scatters off a bit taking out about a third of the devilgants. The remaining unit of Long Fangs and both Rune Priests target the Trygon Prime as well dropping another couple of wounds. The devilgants are outside of synapse but pass their morale test and hold onto their position. The free TWC assault the Trygon Prime and take down the gigantic beast. The two broods of genestealers then drop the one TWC and the first Wolf Lord consolidating around the Long Fangs and Rune Priests.
Turn 3 - Tyranids
In comes the last squad of genestealers arriving on the opposite short table edge along with the other Trygon Prime and the Alpha Warrior attached to the Hormagaunts. I will use the newly arrived unit of genestealers to claim objectives while the Alpha Warrior and his brood come in off the long table edge hiding behind cover... They are in position to charge the free TWC as a counter assault unit following the predicted charge versus the newly arrived Trygon Prime. The devilgants pass their instinctive behavior test and line up to soak the remaining unit of Long Fangs. The other two units of genestealers move into position to assault any survivors. At the beginning of the shooting phase the DoM sucks up another couple of wounds. The devilgants target the Long Fangs and kill all but two including the attached Rune Priest. The Trygon Prime peppers a five man squad of Grey Hunters and drops one. The DoM then drops it's pie plate and blows the demolisher cannon off the Vindicator. The genestealers then assault the last two Long Fangs and take them out then consolidate towards the rhino transporting tje squad of 10 Grey Hunters. Another good turn for the tendril - everything is going according to the Hive Mind's plan.
Turn 4 - Space Wolves
The free unit of TWC along with the second Wolf Lord move into position to assault the Trygon Prime. The remaining Rune Priest moves into position to assault the devilgants. There is little shooting quickly followed by the assault phase. The Trygon Prime is hammered but the devilgants hold versus the Rune Priest and score one wound in return.
Turn 4 - Tyranids
The three Warriors finally arrive dropping in to provide synapse for the devilgants. The first two broods of genestealers and the Alpha Warrior with his posse converge around the free TWC. There are no enemy units close enough for the DoM to suck wounds so it drops it's pie plate on the Grey Hunters' rhino and destroys it. The Grey Hunters pass their tests and hunker down. The TWC and second Wolf Lord are all destroyed in the assault phase by a massive combi charge.
At this point the writing is on the proverbial wall - the dawgs have suffered a horrid amount of losses while inflicting little damage in return except for the pair of Trygons. We play it out and I end up winning the game by two objectives to one (killpoints| Seize Ground versus Capture and Control).
Conclusion
Like I said everything went according to the plan. The Trygons were bait to pull the TWC away from the lil dawgs. My reserve rolls were average and the army performed as expected. I think my opponent's biggest mistake was to castle his army as the genestealers got into his lines early and quickly swept through while avoiding any enemy shooting in return... That was huge. The second mistake was deploying the castle in a corner where they could quickly be reached by my genestealers.The Alpha Warrior with his Hormagaunts were devastating versus the TWC - Tyranids as a whole are very mobile and can lay down lots and lots of attacks... It's all about getting them into position to shoot and assault. You need to get in quick and wreck as much havoc as possible. I've lost to this same SW army twice with my Draigowing so as far as I'm concerned it's no joke. I bought the bulk of my Tyranid army from this same player - I don't think he was expecting what happened. I made a few tweaks to the list presented here such as dropping a winged Hive Tyrant in exchange for the Alpha Warrior and converting a Mawloc into a second Trygon Prime.
No comments:
Post a Comment